Most people just tolerate this annoyance, since eventually, the Start menu will begin working again. However, you don’t have to tolerate it any longer. Use the following tips to get the Start menu working quickly for you again.
Windows 10 Start Menu Not Opening: Why It Happens
There are two main behaviors that can start happening with the Windows 10 Start menu. It either won’t open at all, or it takes more than 5 seconds to finally open. It’s the second behavior that’s the most common, and it’s especially annoying because past versions of Windows always had instantaneous Start menus. Why does this even happen? There are numerous causes, including:
Temporary data files that the Start menu uses are corrupt or out of dateCortana temporary files are corrupt or out of dateA known glitch in Windows 10 that causes the Start menu to freezeThe Start menu under your specific Windows account is crashing or missingWindows Explorer on your system is out of date or includes corrupted files
How to Fix Windows 10 Start Menu Not Opening
Now to get to the fixes and tweaks that will resolve this issue. We’ll work down this list from the easiest quick fixes to the more complex and involved ones.
1. Sign Out of Your Microsoft Account
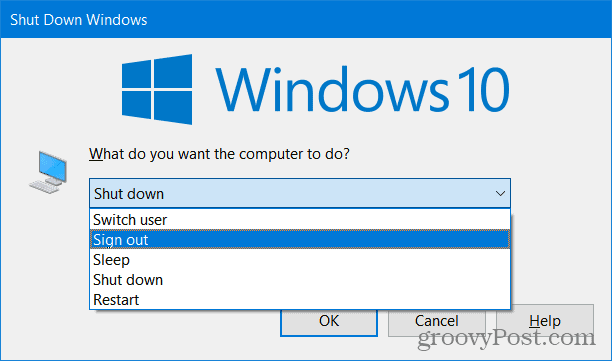
As each user signs in to their Microsoft account on a Windows 10 computer, many of the apps and other things listed on the Start menu get cached. If you stay logged in for long periods of time (as is usually the case with a computer that only has one user), this cache can eventually get very large or corrupted. When you log out and then back into your account, many of these things are cleared and refreshed. So a great quick fix for Windows 10 Start menu issues is simply logging out and back in. To log out, click on your Desktop (not on an app) and press the keyboard shortcut ALT+F4. The Windows 10 Shut down menu will appear and you can choose to either Sign out or do a full Restart.
We mention a full Restart because, for many of us, we don’t restart our computers very often. By restarting the system, everything will get closed out, memory and cache flushed, etc. It’s good to do this from time to time to keep your system running at peak performance. Once you log back into your, test the Start menu to see if the lag is gone.
2. Restart Windows Explorer
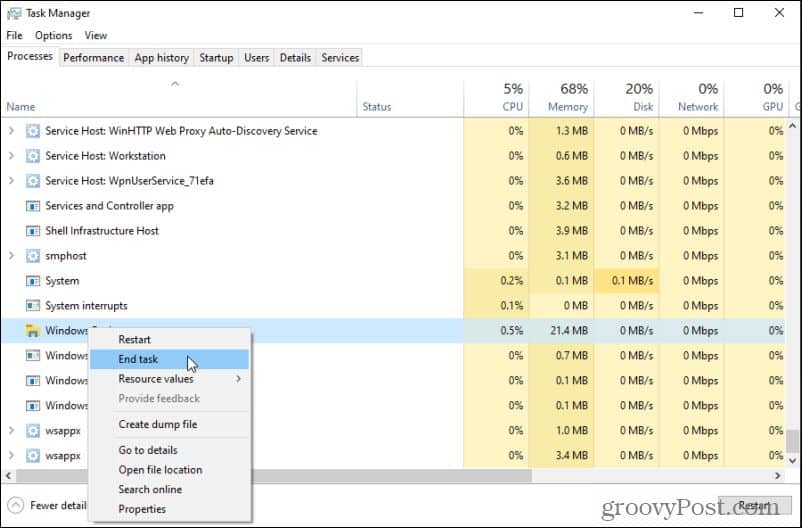
Another issue that happens when you use a Windows 10 computer for a long time is that Windows Explorer can get glitchy. This is also the software that serves the Start menu, so restarting it can resolve a lot of Start menu issues. To restart Windows Explorer, press Ctrl + Shift + Esc to open the Task Manager. Select the Name field to sort apps and processes by name. Then scroll down to Windows Explorer under the Windows Processes section. Right-click Windows Explorer and select End task.
You will see your desktop blink a few times, and the taskbar may actually disappear. Give the computer a few moments to automatically restart the Windows Explorer process. After this, select the Windows 10 Start menu and see if the issues you were having are now resolved.
3. Check for Windows Updates
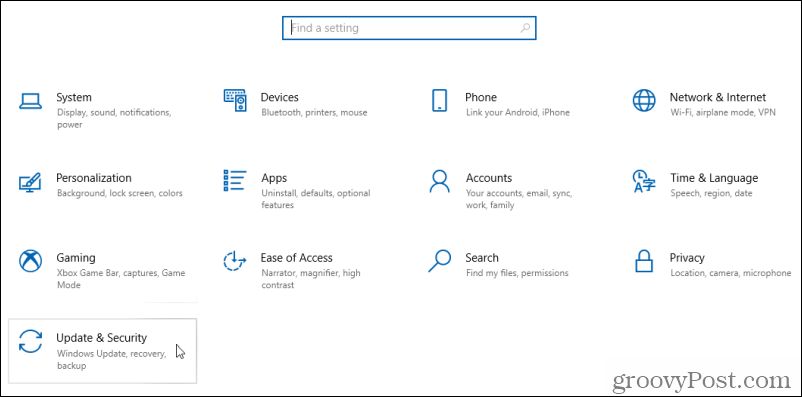
If the problem is still happening, it’s very possible your version of Windows 10 is out of date and buggy. A good quick-fix for this is just to make sure you have all of the latest critical Windows updates. Select the Start menu and select the Settings icon. If your Start menu isn’t working, use Windows Key + I to open Settings. Select Update & Security.
In the Windows Update window, check for and install all critical Windows updates. Under any optional Windows 10 updates, it wouldn’t hurt to select Download and install for any related to Security or Quality. Once all of the latest updates are installed, restart your computer and test the Windows Start menu again.
4. Scan for Corrupt System Files
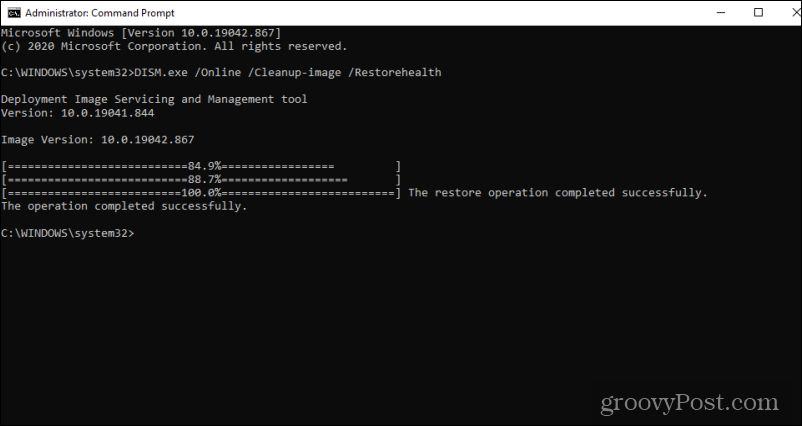
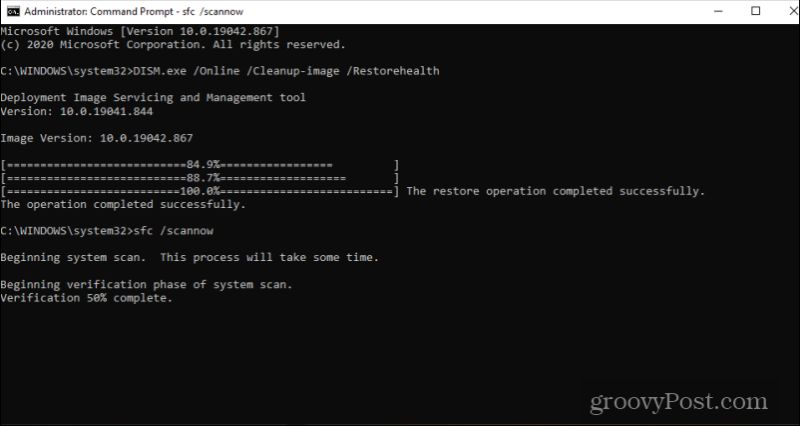
One of the most common causes for a misbehaving Start menu is corrupted or damaged system files. You can do your Windows 10 system a lot of good by running a system file scan and repairing all of those system files. To do this, press Windows Key + R, type “cmd” and press Ctrl + Shift + Enter to open the command prompt as administrator. There are two commands you should use in sequence to fully scan and repair your system: DISM and SFC. In the command prompt window, type the following command and press Enter.
This can take up to 30 minutes, so be patient. When this is finished and you see the message that it’s completed successfully, type the following command and press Enter. When this is finished you’ll see the message “Verification 100% complete”. Type exit to close the Command Prompt.
Restart your computer and test the Start menu again to see if the problems are now gone.
5. Clear Cortana Temporary Files
Many people don’t realize that Cortana is well integrated into the Windows Start menu. Issues with Cortana can actually affect the performance of the Start menu itself. The most common Cortana issue is temporary Cortana files getting corrupted and causing lag every time you select the Start menu. Clear these temporary files and you could quickly resolve the lag issue. To clear Cortana temporary files, press Windows Key + R, type “cmd” and press Ctrl + Shift + Enter to open the command prompt as administrator. Type the following commands in order, and press Enter after each. Note: These commands must be run in this order. They will switch to the Cortana directory, kill the Cortana process, and remove the Cortana directory. Once Cortana restarts, this directory will be recreated and rebuilt fresh. You don’t have to restart the Cortana task manually because Windows will do it automatically. It wouldn’t hurt to restart your computer after running these commands as well. Test the Start menu again to see if the issues you were experiencing are resolved.
6. Uninstall or Fix Dropbox
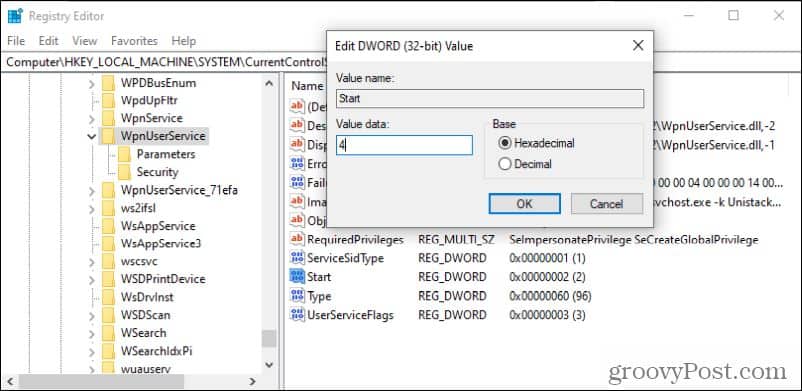
There is a known issue with the Windows 10 Dropbox application that causes conflicts and unusual behaviors with the Windows Start menu. If you don’t use the Dropbox app, then uninstall it from your system and you should see the issues disappear. However, if you want to keep Dropbox, you’ll need to make a tweak to the Windows Registry to fix these conflicts. To do this, press Windows + R, type regedit and select OK. This will open the registry editor. Navigate to: Double-click the Start Dword in the right pane. The default setting here is 2. Update this to 4 and select OK.
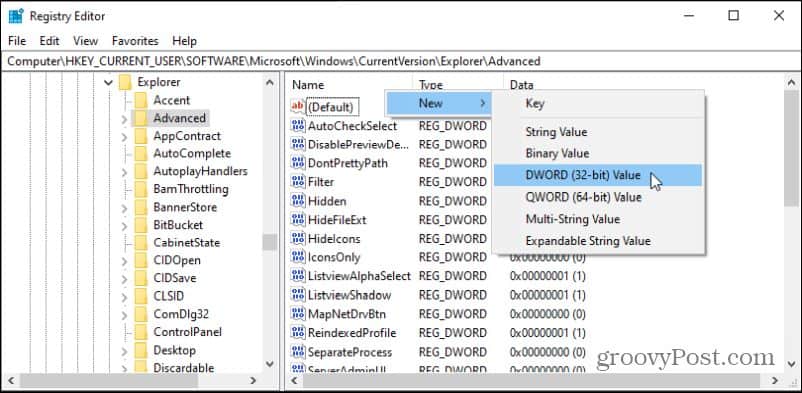
You should restart your computer for the new registry settings to take effect. For Dropbox users, this is a very common complaint and most users report that this fix nearly always resolves the problems their seeing with their Start menu. 7. Xaml Start Menu Registry Entry When Microsoft switched to the new Windows 10 Start menu, it included launching the Xaml process that ran it. There are known conflicts that arise when you disable User Access Control (UAC) that cause the new Windows Start menu to not work properly. Ensure the Xaml Start Menu is enabled to creating and setting the EnableXamlStartMenu in the Windows registry. Press Windows + R, type regedit and select OK to open the registry editor. Navigate to: Right-click on the empty space in the right pane, choose New > DWORD (32-bit).
Name this new entry EnableXamlStartMenu and leave the value set to 0. Now, reset the computer and test the Start menu again.
Windows 10 Start Menu Problems
Problems using the Windows 10 Start menu can be especially annoying because everything you want to use – apps, settings, and more – are all found there. Hopefully one of the solutions above resolved your issue and this annoying problem won’t plague you anymore. In trying to execute item 5 by running, CD/d “%LOCALAPPDATA%PackagesMicrosoft.Windows.Cortana_cw5n1h2txyewy” I get a “The system cannot find the path specified” error. Can you help with where I should go to correct this. CHeers, Les Thanks! Steve groovyPost.com I have checked so many reviews looking to solve a screen flickering issue going on on my Lenovo laptop. The instalation of the Auslogic Registry Cleaner may see the one to blame for this. The difficult part of it is that the Start menu is completely blocked. Nothing works except the TaskBar. However, restarting/ending task of the Windows Explorer don’t move the needle. Would you please help me out to get this Lenovo back on track without going to factory resetting. scanning for corrupt system files worked for me. Thanks for letting us know. We’re going to do a full review of this article shortly to check all of the steps are still working in 2022. Steve groovyPost Comment Name * Email *
Δ Save my name and email and send me emails as new comments are made to this post.


![]()
