One way around this is to enable local network sharing in iTunes. This lets you access your iTunes file from other compatible devices. Our tutorial below will show you how to enable this sharing in iTunes on your Windows 10 computer.
Local Network Sharing in iTunes in Windows 10
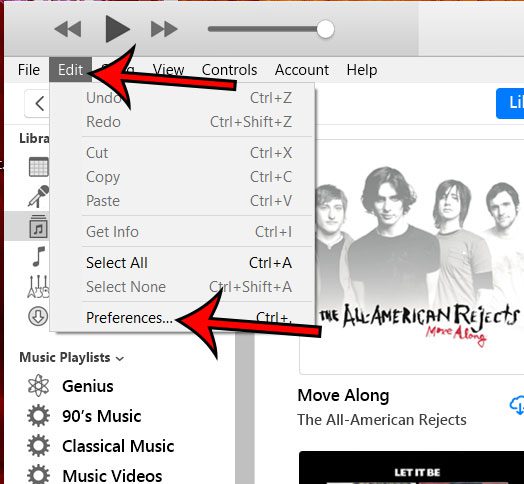
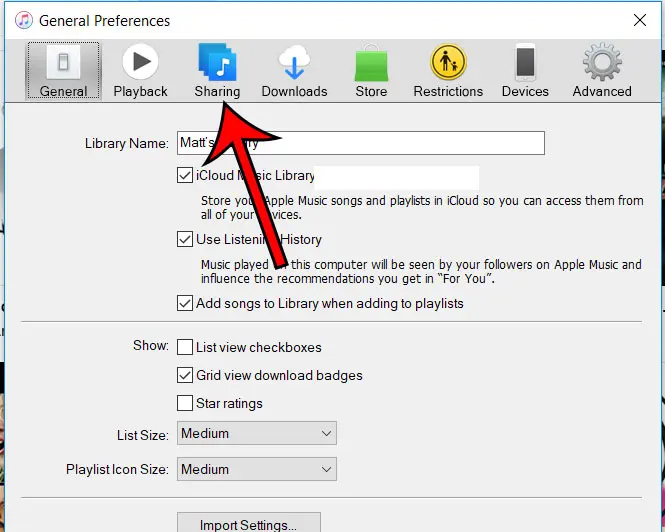
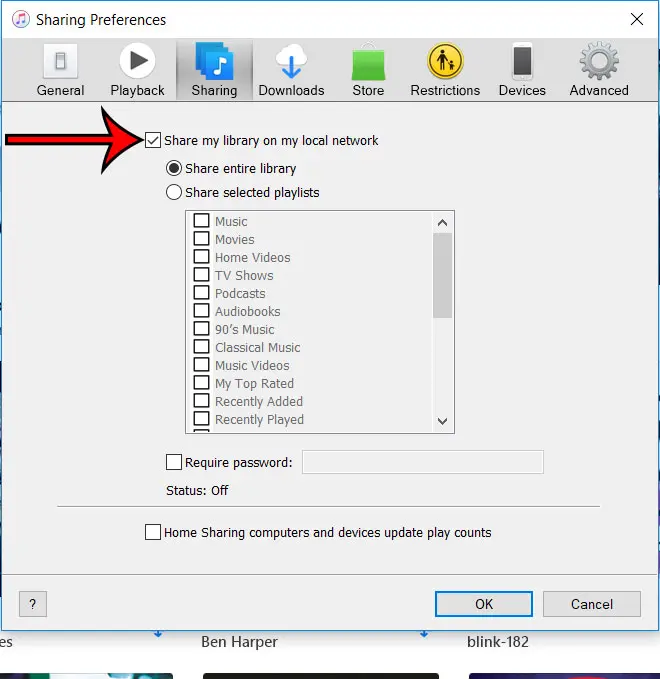
The steps in this article were performed in version 12.9.2.6 of the iTunes software. By enabling this option you will be allowing other devices on your network to access your iTunes library so that they can play that media on their device. Step 1: Open iTunes. Step 2: Click Edit at the top of the window, then choose the Preferences option. Step 3: Choose the Sharing tab at the top of the window. Step 4: Check the box to the left of Share my library on my local network. Note that you can also configure which playlists are shared, as well as create a password and decide whether sharing changes play counts. Once you’re done, click the OK button at the bottom of the window. Have you ever needed to create a list of the songs you have in iTunes? Find out how to create and print this list so that you can access it if you ever need it. After receiving his Bachelor’s and Master’s degrees in Computer Science he spent several years working in IT management for small businesses. However, he now works full time writing content online and creating websites. His main writing topics include iPhones, Microsoft Office, Google Apps, Android, and Photoshop, but he has also written about many other tech topics as well. Read his full bio here.
You may opt out at any time. Read our Privacy Policy